Tutorial 5 of 7
Assembly, routings and quality
Advanced 15 min
Join parts from two feeder lines at an assembly station, add an end-of-line test with scrap and a rework loop, and model a job shop where each product family follows its own routing.
Real factories are networks, not straight lines. This tutorial uses two templates to show the building blocks: assembly (merge), split/routing, quality checks with scrap and rework, and product routings.
Part A — Assembly with two feeders
Open the template Assembly with two feeders.
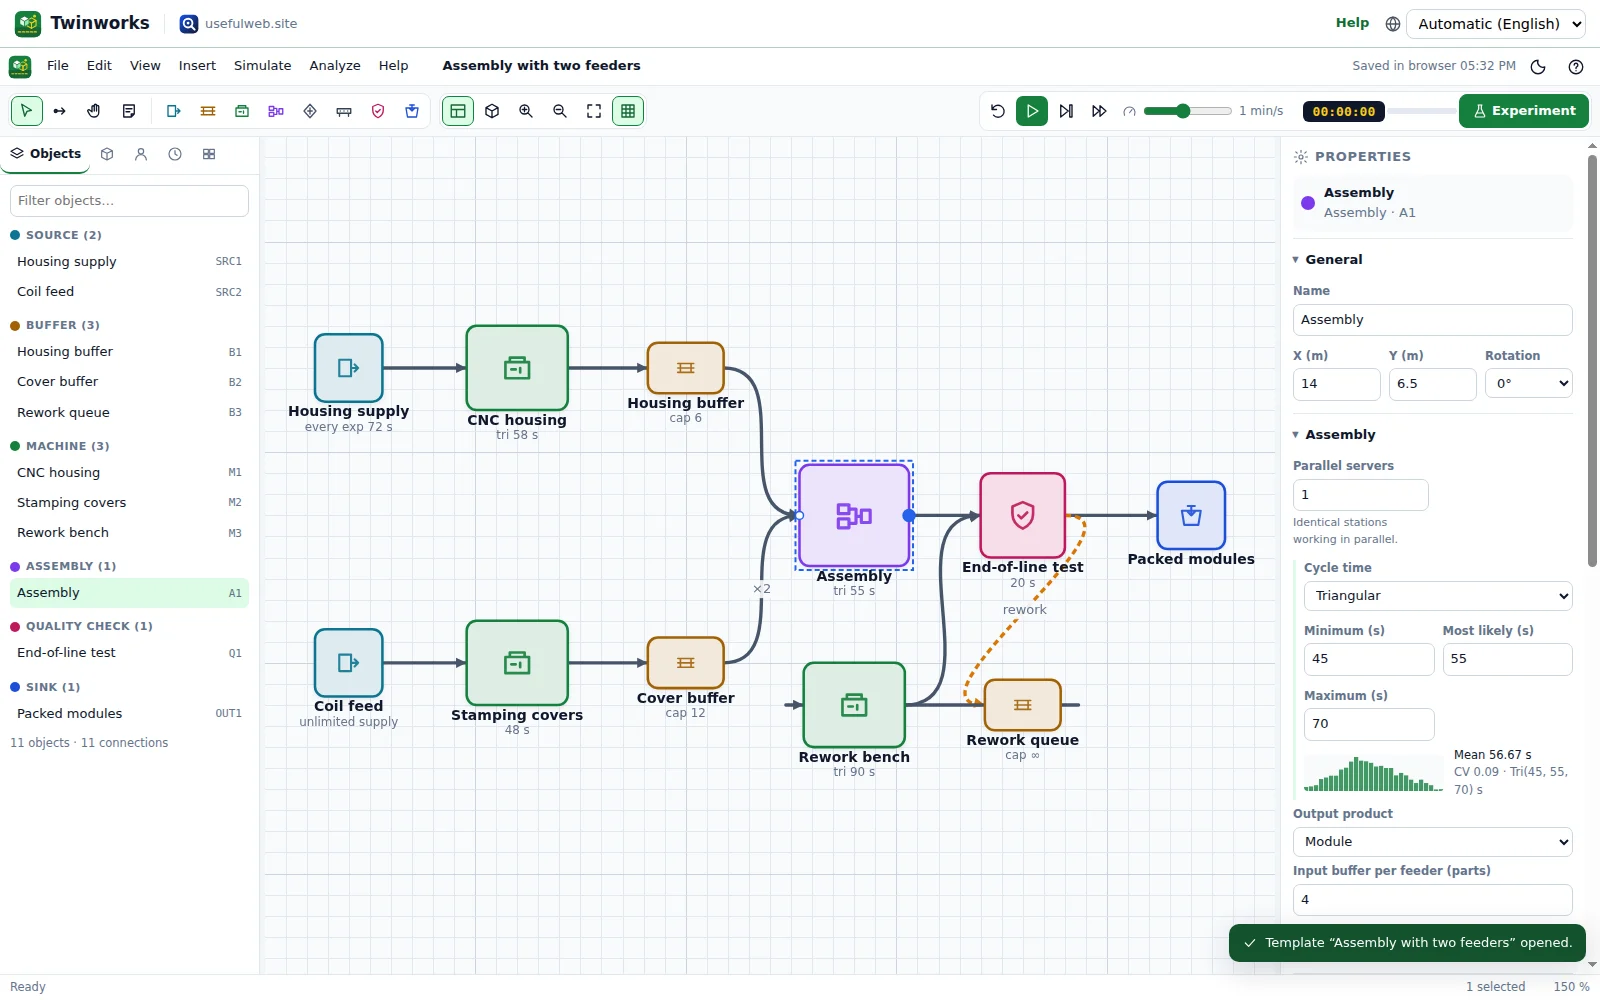
1. The bill of materials is on the arrows
Housings come from the CNC housing line, covers from the Stamping covers press (which makes 2 covers per cycle — Batch size 2). Click the arrow from Cover buffer to Assembly: Parts per assembly is 2. The arrow from Housing buffer has 1. So one module = 1 housing + 2 covers.
Select the Assembly station:
- Output product: Module — the joined part gets a new product (colour, price).
- Input buffer per feeder (parts): how many parts of each input the station can hold while it waits for a complete kit.
- Operators & shifts: the station needs one person from the Assemblers pool.
The assembly starts only when every input has its quantity ready — if covers are missing, it waits (starved) even if housings pile up.
2. Quality check with scrap and rework
Select End-of-line test (a Quality check object):
- Scrap (%)
2— parts that fail are removed and counted as scrap. - Rework (%)
6— parts go along the rework arrow (orange arrow labelled rework) to the Rework queue and the Rework bench, then back to the test. - Max. reworks per part
1— a part that fails again after one rework is scrapped.
To draw a rework arrow yourself, connect the quality check to the rework buffer, right-click the arrow and choose Rework. A Scrap arrow sends rejected parts to a sink of your choice instead of removing them.
3. Results
An experiment with the template's 5 replications gives about 46.9 ± 3.3 modules per hour. The bottleneck is the CNC housing machine (busy 76 %), the scrap rate is about 2.3 % (2 % first-pass scrap plus reworked parts failing again), and the Assemblers pool is busy 42 % of the time. The Cost tab adds machine time, labour, material and scrap to a cost of about 13.9 € per good module.
Part B — Job shop with routings
Open the template Job shop with routings. Three product families (Shaft A, Flange B, Hub C) visit four machine groups in different orders.
4. Product routings
Open the Products tab on the left. Each product has a Routing — an ordered list of process steps:
| Product | Routing | Mix |
|---|---|---|
| Shaft A | Lathe → Mill → Grinder | 40 % |
| Flange B | Mill → Drill | 30 % (priority 1) |
| Hub C | Lathe → Drill → Grinder | 30 % |
Use + add step… to append a step and the small × (Remove step) to remove one.
5. The routing hub
The Transport hub is a Split node with the rule Product routing (job shop): every part that arrives is sent to the queue in front of the next step of its routing; finished parts go to the sink. Each machine sends its part back to the hub. Other split rules:
- Percentages — weights on the outgoing arrows (e.g. 70/30).
- Round robin — alternate between outputs.
- Shortest queue — pick the output with the fewest parts waiting.
- By product type — each arrow lists the products it accepts.
- First available — the first output that has space.
The queues use the discipline Priority, so Flange B (priority 1) overtakes the others. FIFO and LIFO are also available.
6. Setups on product change
The Mill has a constant 150 s setup whenever the product family changes. In the State Gantt you see violet setup blocks between parts of different colours. With 19.5 ± 1.1 orders per hour, the Utilization tab shows the mill processing only 38 % of the time — less than the lathe (44 %) and the grinder (45 %). But it spends another 29 % in setup, so it is active 67 % of the time with the longest active periods (162 s on average). The active-period method therefore names the mill as the bottleneck (56 % of the time) — a utilization ranking that ignores setups would have picked the wrong machine. The Setup time −50 % (SMED) what-if shows what a quicker changeover is worth.
Next: Line balancing and cost.